Recently, I wrote a post about the tools to use to deploy deep learning models into production depending on the workload. In this post I will show in detail how to deploy a CNN (EfficientNet) into production with tensorflow serve, as a part of TFX. The starting point here is a fine-tuned version of a keras model from here.
What is tensorflow serve?
TensorFlow Serving is a flexible, high-performance serving system for machine learning models, designed for production environments. TensorFlow Serving makes it easy to deploy new algorithms and experiments, while keeping the same server architecture and APIs. TensorFlow Serving provides out-of-the-box integration with TensorFlow models but can be easily extended to serve other types of models and data.
https://github.com/tensorflow/serving
So, as you can read, TensorFlow serve is meant to be production ready. I’ve read that it is used at google for delivering a huge number of models at once. The biggest problem is that it lacks documentation (typical to google) and you don’t find much examples, where people actually use deep learning models in production. This is the often-called gap between modelling ANNs and the industry adoption. I hope I can help a bit with this post.
First attempt
Following this tutorial it seems quite easy and for the MNIST example and it should work. The steps to make it work are:
- Export your model in the SavedModel format
tf.saved_model.simple_save( keras.backend.get_session(), export_path, inputs={'input_image': model.input}, outputs={t.name:t for t in model.outputs}) - Make sure the directory structure is versioned. The saved model must be versioned by a subfolder named by a simple version number. MODEL_NAME/VERSION/..
- Serve your model with tensorflow_model_serve
- Write a rest client, which does all the preprocessing
This approach has some hints, you don’t want in real scenarios:
- The input data is a raw bitmap image as json array (triples of integers for each pixel), we don’t want to send such a format, we want to send jpegs.
- The hole preprocessing is done in the client, but we want an API, which does simply take images and make predictions
You either wrap the API in another or you try to include the preprocessing in TensorFlow serve.
Accepting jpegs
The problem with TensorFlow serve is that you don’t have a chance to insert custom code. Everything must be included into the DAG of the SavedModel.
If we want to use a REST API with base64 encoded jpegs, we must somehow make the decoding of the jpeg and resizing of the image as a part of the model. It turns out that this is only possible by adjusting the model architecture (DAG) and include these operations into the model.
Example:
We have our keras model, which does image classification and the model is rather complex (EfficientNet code and paper) but has an input layer accepting 300×300 images Input(shape=(None,300,300,3)) and an output of several class activations Dense(16, activation=’softmax’). This model accepts raw pixel values as an input. Obviously we don’t want to send raw pixels to our REST API.
Adding the preprocessing
To make this happen, we need to replace the current input layer from keras with new TensorFlow tensors. Sounds easier than it is. First we have to extend the keras model with TensorFlow tensors and second we need to find the correct preprocessing, handling base64+jpeg decoding. Finally we need to export the model to the SavedModel format and get it running in TensorFlowX.
Here is the code to make it happen, look in the comments for explanation.
import tensorflow as tf
sess = tf.Session() # get the tensorflow session to reuse it in keras

from keras import backend as K
from keras.models import load_model
from efficientnet import EfficientNetB3

K.set_session(sess) # set it
K.set_learning_phase(0) # make sure we disable dropout and other training specific layers

string_inp = tf.placeholder(tf.string, shape=(None,)) #string input for the base64 encoded image
imgs_map = tf.map_fn(
    tf.image.decode_image,
    string_inp,
    dtype=tf.uint8
) # decode the jpeg
imgs_map.set_shape((None, None, None, 3))
imgs = tf.image.resize_images(imgs_map, [300, 300]) # resize images
imgs = tf.reshape(imgs, (-1, 300, 300, 3)) # reshape them
img_float = tf.cast(imgs, dtype=tf.float32) / 255 - 0.5 # and convert them to floats

model = load_model('effNet.h5', compile=False) # load the keras model

w = model.get_weights() # save weights to be sure that they are not messed up by the global and local initialization later on

output = model(img_float) # Stack the keras model on top of the tensorflow graph -> the efficient net model is accepting base64 encoded images as a string

builder = tf.saved_model.builder.SavedModelBuilder('cnn')

tensor_info_input = tf.saved_model.utils.build_tensor_info(string_inp)
tensor_info_output = tf.saved_model.utils.build_tensor_info(output)

# we need to init all missing placeholders
sess.run(tf.local_variables_initializer())
sess.run(tf.global_variables_initializer())

#set the weights to make sure they are not somehow changed by the init we did before
single_gpu.set_weights(w)

# define the signature
signature = tf.saved_model.signature_def_utils.predict_signature_def(
    inputs={'jpegbase64': string_inp}, outputs={'predictions': output})

#finally save the model
builder.add_meta_graph_and_variables(
    sess=K.get_session(),
    tags=[tf.saved_model.tag_constants.SERVING],
    signature_def_map={
        tf.saved_model.signature_constants.DEFAULT_SERVING_SIGNATURE_DEF_KEY:
            signature
    })
builder.save()
Now we have a model which accepts strings as input and does the decoding and the resizing of the image on its own.
Server and Client
Now we can serve the model the same way as in the tutorial. To activate the REST endpoint, we just supply the rest_api_port and we are done (at least this part is straight forward). Port 9000 is for gRPC calls, which would be more convenient, when directly using the API within a wrapper API.
tensorflow_model_server
--model_name=my_cnn--model_base_path=/home/ubuntu/models/cnn
--port=9000 --rest_api_port=8501
Now we can use test the model with POSTMAN or with curl and get a json response from the model:
(echo -n '{"instances":[ "'; base64 ~/Pictures/1.jpg; echo '"]}') |
curl -X POST "Content-Type: application/json" -d @- localhost:8501/v1/models/cnn:predict
{
    "predictions": [
        {
            [0.112, 0.03, 0.09, ..]
        }
    ]
}
Limitations and conclusion
Unfortunately, it is not possible to change the signature of the predictions (e.g. map the output classes to meaningful names). Well, we could add a custom layer again, but doesn’t feel right.
Another approach is to encapsulate the TensorFlow serve server completely into another REST API and not customize the model itself. In this scenario it would be possible to do all the pre- and postprocessing in Python and only use the model server for the predicitons. However you would still have the overhead of webserver handling raw pixel data, even if it’s local and even if you use gRPC instead of REST.
To sum up, Tensorflow serve seems to be a good option to serve multiple models at once. For a single model it seems pretty chucky and in general it lacks of documentation. However it’s fast, it’s working and it’s stable.
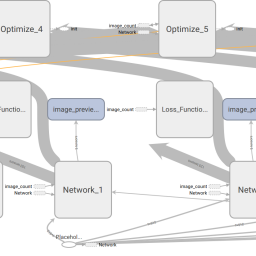
[…] Finally, we export the model as a servable SavedModel, which can be deployed in Tensorflow Serve. […]